For years, the word “acceleration” has been a dirty word in the world of competitive gaming. If you grew up playing shooters like Counter-Strike or Quake, the first thing every guide told you to do was go into your Windows settings and turn off “Enhance Pointer Precision.” We were told that acceleration was the enemy of muscle memory. We were told that it made your aim inconsistent and unpredictable. And for the longest time, that was absolutely true. The way Windows handles acceleration is messy, non-linear, and quite frankly, terrible for anyone trying to hit a headshot.
But then came Raw Accel. I remember the first time I heard about it. I was skeptical. Why would I want to add acceleration back into my workflow after years of training my arm to move at a 1:1 ratio? After spending a few months tinkering with it, I realized I was looking at it all wrong. Raw Accel isn’t about making your aim “random.” It is about giving you a level of control that static sensitivity simply cannot offer. It allows you to have the precision of a low-sensitivity player for those tiny micro-adjustments while still having the speed of a high-sensitivity player when you need to do a 180-degree turn.
In this long-form guide, I want to take you through everything you need to know about Raw Accel. We will talk about how it works, why it won’t ruin your muscle memory, and how you can set it up to finally get the best of both worlds.
What is Raw Accel and Why Does it Matter?
Raw Accel is a free, open-source driver that allows you to apply a custom acceleration curve to your mouse input. Unlike the built-in Windows acceleration, which is often tied to your frame rate or other weird system variables, Raw Accel operates at the driver level. This means it is incredibly consistent. If you move your mouse at a certain speed, it will always result in the same output, regardless of what is happening on your screen.
The reason this is a game-changer is because of the physical limitations of our hands and mousepads. If you play on a very low sensitivity to be accurate at long ranges, you often run out of mousepad space when trying to track a fast-moving target up close. If you play on a high sensitivity to be fast, you might find your hand shaking during those tiny, precise movements. Raw Accel solves this by letting you define a “curve.” You can tell the software: “When I move my mouse slowly, keep my sensitivity low. When I flick my mouse fast, increase my sensitivity.”
The Muscle Memory Argument: Debunking the Myth
One of the biggest hurdles people face when trying Raw Accel is the fear of ruining their muscle memory. I used to think the same way. I thought that my brain only knew how to move the mouse X distance to get Y result on the screen. But the human brain is much smarter than we give it credit for. Your brain doesn’t just learn distances; it learns relationships and patterns.
Think about driving a car. When you press the gas pedal, you don’t just learn one position for the pedal. You learn that the harder you press, the faster you go. Your brain adapts to the “acceleration” of the car perfectly. Aiming with Raw Accel is the same thing. Once you spend a few days with a consistent curve, your brain begins to map the speed of your hand to the movement on the screen. I found that my flick shots actually became more consistent because I wasn’t fighting my mousepad’s edges anymore.
Setting Up Raw Accel: A Step-by-Step Walkthrough
Before you dive into the settings, you need to get the software installed correctly. Raw Accel is a driver, not just a simple app, so it requires a bit of care. First, you’ll want to head to the official GitHub page to download the latest release. You will also need to make sure you have the latest Visual C++ Redistributable installed, or the driver won’t be able to communicate with your system.
Once you download the folder, you’ll see an “installer.exe.” Run that as an administrator, and once it finishes, you must restart your computer. This is a non-negotiable step. Because Raw Accel lives in the kernel level of your OS to ensure there is zero latency, it needs a fresh boot to hook into your mouse input. After you restart, open the “writer.exe” file. This is the interface where you will actually play with your settings. Don’t be intimidated by the graphs and numbers. We are going to break those down right now.
Understanding the Key Settings
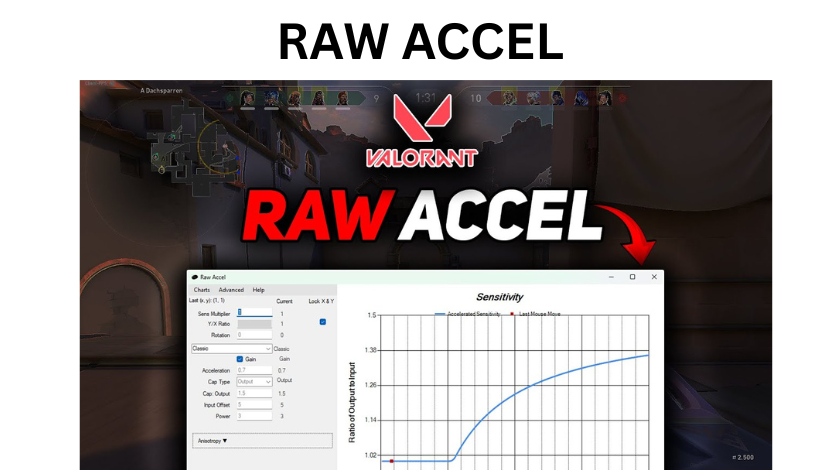
When you first open the UI, you’ll see a lot of boxes. Let’s look at the most important ones. The “Sensitivity Multiplier” is your base speed. If you set this to 1, your mouse feels exactly like it does normally. If you want to lower your overall sens, you can set it to something like 0.8.
The “Acceleration” value determines how quickly your sensitivity ramps up as you move your mouse faster. A little goes a long way here. Most people start with a value like 0.05 or 0.1. If you go too high, your crosshair will fly across the room at the slightest twitch.
Then there is the “Cap.” This is the most important setting for consistency. The Cap tells the software, “No matter how fast I move my mouse, do not let the sensitivity go above this multiplier.” For example, if your cap is set to 2, your sensitivity will never be more than double your base speed. This prevents that “out of control” feeling during panicked moments in a game.
Finding Your Curve: Linear vs. Natural
There are several types of curves you can choose in the dropdown menu. The most common ones are “Linear” and “Natural.”
A Linear curve is straightforward. The faster you move, the faster the sensitivity increases in a straight line. This is great for people who want a very predictable feel. However, I personally prefer the “Natural” curve. The Natural curve starts slow, peaks in the middle, and then levels off. I found that this felt much more “human.” It allowed me to have a very stable “slow zone” for tracking heads at a distance, but the moment I needed to flick to a target on my flank, the acceleration kicked in smoothly.
I recommend starting with a very gentle Linear curve. Use it in a practice range or an aim trainer like Kovaak’s for 30 minutes. Don’t worry about your score. Just feel how the mouse moves. If it feels too jumpy, lower the acceleration value. If you feel like you’re still working too hard to turn around, increase the cap.
Is It Safe? Anti-Cheats and Competitive Play
This is the question I get asked the most: “Will I get banned for using Raw Accel?” The short answer is no. Raw Accel has been around for a long time and is widely used in the professional scenes of Valorant, Apex Legends, and Quake.
The software is whitelisted by major anti-cheats like Vanguard (Riot Games) and Easy Anti-Cheat. This is because Raw Accel does not “aim” for you. It doesn’t read game memory or modify game files. It simply modifies how your mouse hardware talks to your Windows operating system. It’s no different than changing the DPI on your mouse software, like Logitech G Hub or Razer Synapse. I’ve used it on my main accounts for over two years without a single issue, and many pros, like fakeAnanas in the Valorant community, have proven it is perfectly viable for high-level play.
Common Pitfalls to Avoid
The biggest mistake I see beginners make is “over-tweaking.” It is very tempting to change your settings every time you have a bad game. You’ll think, “Oh, my acceleration is 0.02 too high,” and you’ll change it. This is how you actually ruin your muscle memory.
When you find a curve that feels even remotely comfortable, stay on it for at least a week. Your brain needs time to map those new physical sensations. Another mistake is copying a pro player’s curve exactly. Mouse settings are incredibly personal. They depend on your mousepad friction, your mouse weight, and even the way you grip your mouse. Use pro settings as a starting point, but don’t be afraid to deviate to make it fit your hand.
Conclusion: Should You Try It?
Raw Accel isn’t a magic pill that will suddenly give you god-like aim. Aiming still requires thousands of hours of practice, good crosshair placement, and game sense. However, what Raw Accel does is remove the physical constraints of a static sensitivity. It gives you the freedom to be both precise and fast without compromise.
If you find yourself constantly switching between high and low DPI because you can’t find a balance, or if you feel like your mousepad is just too small for your playstyle, give Raw Accel a shot. It’s free, it’s safe, and once you get past the initial learning curve, you might find it’s the best thing you ever did for your setup.
FAQs
Q: Does Raw Accel add input lag?
A: No. Because it operates at the kernel level as a driver, it processes the mouse movement almost instantaneously. There is no measurable difference in latency compared to using no acceleration.
Q: Do I need to keep the app open while playing?
A: No. Once you hit “Apply” in the Raw Accel UI, the settings are saved to the driver. You can close the interface and the acceleration will still work. You only need to open the app if you want to change your settings.
Q: Can I use this with any mouse?
A: Yes. Raw Accel works with any mouse that is recognized by Windows. It doesn’t matter if it’s a $150 gaming mouse or a $10 office mouse.
Q: How do I uninstall it?
A: To uninstall, you must run the “uninstaller.exe” included in the folder and then restart your computer. Simply deleting the folder will not remove the driver from your system.